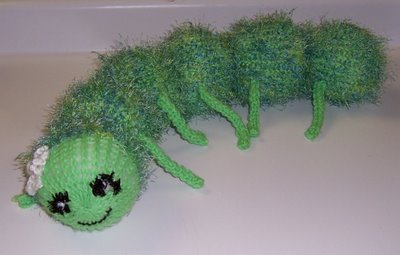
Cornelia the Caterpillar

Materials:
Pink Knifty Knitter Long Loom*
1 Skein Bernat Softee Chunky Electric Lime
2 Skeins Lion Brand Fun Fur Prints Citrus
Yarn Needle
Fiber fill
Ruler
Scrap yarn or embroidery floss to embroider face
Skills
Casting on
Knitting a tube
Knitting I cord
Measuring
How not to poke yourself in the eye whilst sewing
Begin
Legs
With Electric Lime and three pegs on the pink loom, knit a piece of I cord that's 6 inches long. Remove from loom leaving a 15 inch tail for sewing onto the body later. Repeat 9 more times until you have 10 legs total. Set all 10 legs aside for now.
Body
With Electric Lime and Citrus held together as one, cast on completely around the pink loom. Knit. Continue knitting until you have a tube 22 inches long. Drop the Citrus (Fun Fur), leaving a tail which you will weave back in later. Continue knitting with the Electric Lime until the tube is 24 inches in total. (Two more inches after you drop the Fun Fur.) Cut the yarn leaving a tail about 18 inches.
Thread the tail onto a yarn needle and starting at peg one sew up through the loop on the peg, continue sewing up through each loop until you've gone all the way around. Sew up through the loop on peg one one more time. Remove loops from pegs and pull yarn to gather and close the end. Sew a few stitches to secure then weave in end. Face End.
Assembly
Using a ruler measure 6 inches down from the face end. Thread a yarn needle with about 18 inches of yarn and sew in and out of the stitches at the 6 inch mark until you've gone back to the start of your stitches. Pull to lightly gather but do not close. Using fiber fill stuff this section of the caterpillar until it is nicely rounded. (you can also add squeakers or rattly bits etc at this time) Pull the stitches tightly to gather and close bind off.
Measure down 6 inches and repeat the process sewing, stuffing and binding until you reach the tail end. Once all six sections are completed sew two legs, evenly spaced, onto each of the 5 body sections of the caterpillar. (I used a kniiting needle and cruelly ran Cornelia through to assure her legs weren't wonky.)
Weave in all loose ends
Embroider a face and add a flower or bow and Voila! a fun and fluffy caterpillar for you or someone you love.
*I'm fairly sure the round blue loom would work equally as well.
Special Note
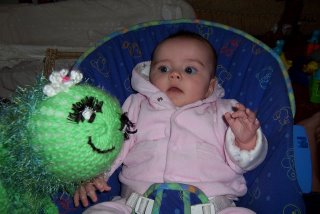
I made this for my 3 month old niece Lara. Over the next few years she will be chewing, tugging, stomping, squeezing, biting and probably playing fairly roughly with this and any other toys she might come across. I sewed everything on extra tight to prevent little hands from ripping off and little mouths from swallowing. You should take the same precautions for any child under three.
Lara and her caterpillar.


4 Comments:
I love this! Thanks. Might you have a picture?
I've added the photo at the top. I'm not quite on top of things yet. It's hard to come back to the real world. lol
What a cutie!! I simply must make several of these for my grandchildren. Thanks for sharing.
I gotta make one of these for my little grandson. Its sooo cute. Thanks.
aarons.grannie@gmail.com
Post a Comment
<< Home